28 Sep Venom Bell Tower Mod Installation Instructions
Thanks for purchasing our FlipMods Venom Pinball Bell Tower Mod! We have put together a video and these instructions to help aid you in the install. Total installation time is 30 minutes or less on the pro version (longer on Premium / LE) and only requires a Phillips head screwdriver. If you have any questions, please contact me!
Installation Instructions
*NOTE* These instructions are based off installation on a Pro model, however, Premium & LE are very similar and covered below. Also, it is easier on the Pro to remove the bell tower than it is on Premium & LE, so if you don’t want to remove the building, you don’t have to. The Premium / LE install requires a little more work than the pro version.
- Power down your pinball machine and unplug it to be safe.
- Remove the glass and all pinballs.
- Lift the playfield in the upright position.
- Locate the wire harness that is attached to the bell tower and disconnect it.


- This step is not necessary, but it certainly helps. It will be easier if you tape an extra wire to the wire harness so when you are ready to pull the wire harness back under the playfield, you can use the wire to assist.

- Lower the playfield and locate the bell tower. Remove the 2 screws in the front on the bottom. This is what holds the bell tower in place. *NOTE* I recommend putting a clean rag on the playfield, this way you protect the playfield and parts.

- a) Lift the bell tower up and over the bracket which holds it in place, and place it down on the rag on the playfield. If you taped a wire to the harness on the bottom of the playfield, be sure not to pull it all the way through.

- b) Remove the tape from the wire and wire harness
- Once the bell tower is removed from the playfield, bring it over to your work bench or a flat surface to work on. Then, locate the 2 screws on the roof, the 1 screw on the bottom of the right side, and the 1 screw on the bottom of the left side, and remove them. It’s easier to remove the roof first. This will disassemble the bell tower completely. *NOTE* Keep all these screws as we are reusing them.
")

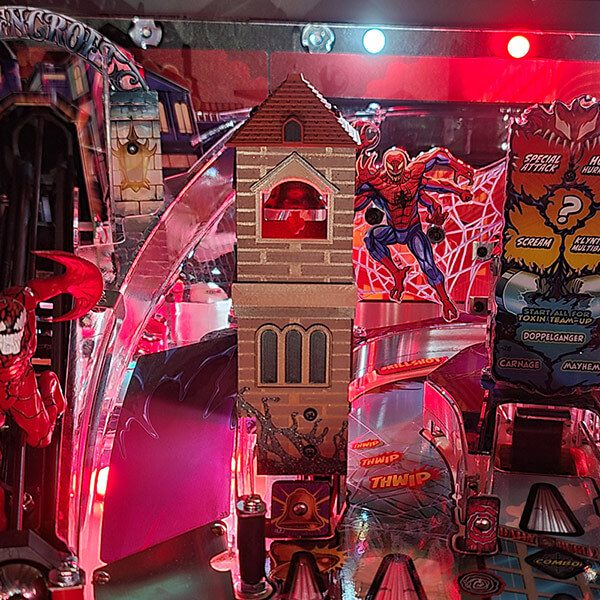
- Now that the bell tower is apart, it’s time to install the panels. Starting with the left side, remove the backing of the double sided tape on the Venom Bell Tower Mod’s left side panel. Next align the bottom screw hole on the Bell Tower Mod with the bottom screw holes on the stock bell tower, and the window on the mod with the window on the stock bell tower. *NOTE* If the flasher boards get in the way, you can carefully bend the bracket back a little bit or use the 2 included black spacers instead of the stock white spacers to move the flasher boards back a bit.


- a) Once the left side is installed, it’s time to install the right side next. The order of the installation of panels matters, front should be last.

Illumination Kit Step
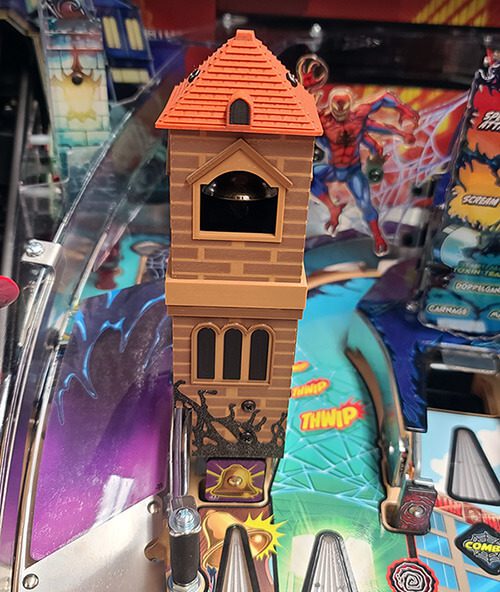
- b) If you purchased the illumination kit for your Pro model, we need to mount the bulb on the interior of the bell tower, on the left hand side, using the stock screw hole and screw. Don’t tighten it all the way yet.


- b) If you purchased the illumination kit for your Premium or LE model, we need to mount the 2 LED strips on the interior of the bell tower, on the left and right hand side of the mount, using the double sided tape on the strips. Install the splitter above the playfield and later on pull thru same hole as stand-up target directly in front of bell tower.
")
")
- c) Now let’s go back to the right side, remove the double sided tape backing on the Bell Tower Mod right side panel, line up the screw hole and window and screw the right side in with the stock screw. Don’t tighten all the way yet.

- d) Time to install the front panel. The reason why we install the front last is because the sides of the front panel overlap the left and right side panels to give the building a clean, uniform look. The brick pattern continues around the sides, making it look as real as possible. Remove the double sided tape backing on the Venom Bell Tower Mod front panel, then align the 2 holes on the bottom and the window with the front of the stock bell tower, and affix the front panel.

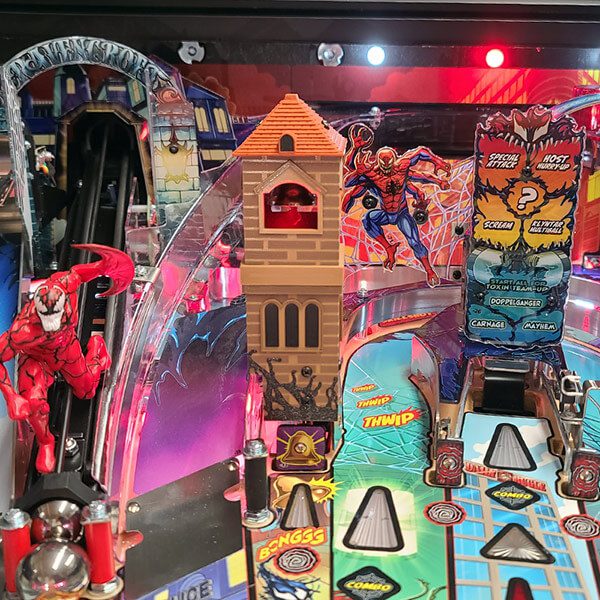
- e) Now that the front panel is installed, you can loosen the left and right sides a bit and push those panels toward the front to align them even more. *NOTE* The roof will be installed once in the machine.
f) Go back to the pinball machine and prepare to reinstall the Venom Bell Tower Mod. If you pulled a wire in step 5, tape the bell tower harness to that wire.

- Place the bell tower somewhere safe (propping it on the bell tower mount works, but be careful) and lift the playfield in the upright position again.
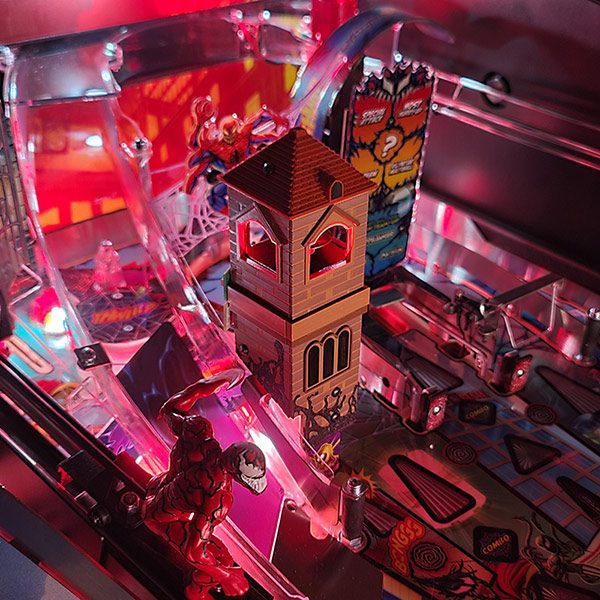
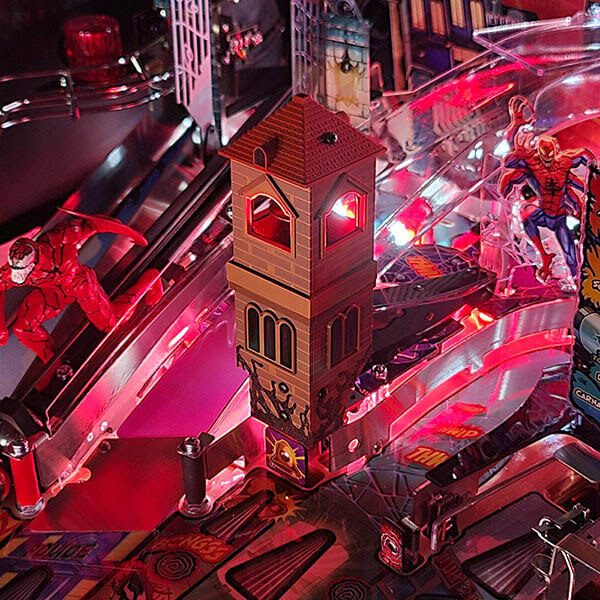
- If you purchased an illumination kit, let’s connect it to the closest GI bulb. I included a red and white LED bulb with the kit, so depending on which color you choose will dictate which bulb you connect to.

*NOTE* I am using the red GI bulb because I used a red bulb in the bell tower. Pull back the wire shrink on the wires of the GI bulb that you choose to expose the terminals. Attach the alligator clips to the terminals with the red clip being on the red wires and the black clip being on the yellow wires.

- a) Feed the illumination kit wiring through the hole underneath the target in front of the bell tower while grabbing it above the playfield. Slowly pull a little bit above the playfield, being careful not to pull too much.

- Next, carefully pull the wire that you taped to the wire harness through the playfield to pull the stock harness through. *NOTE* You may have to use tweezers or something to get the Molex connection through the playfield.
Connect the stock harness back and remove the wire that you used to feed the wire harness through the playfield.

- Lower the playfield to start mounting the bell tower back in place. First, connect the illumination kit wiring to the bulb wiring. Then, carefully slide the bell tower over the mounting bracket being careful of the wiring. You may have to push some of the illumination kit’s wiring back below the playfield. *NOTE* Make sure the wiring is behind the target and not in front of the opto in the Life Foundation loop.
Screw the bell tower back onto the bracket using the stock screws and the 2 holes on the front of the tower.


- Finally, let’s install the roof! Line up the 2 holes on the sides and install 1 of the stock screws loosely. Next, install the other stock screw on the other side and tighten both screws.

You’re all done! The next step is to go get a new Grand Champion score!
Haven’t purchased your FlipMods Venom Bell Tower Mod yet? You can below!

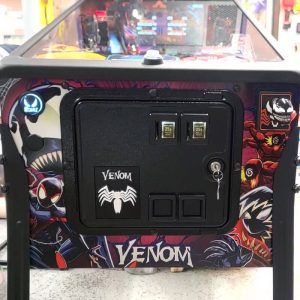
Venom Bell Tower Mod
$70.00
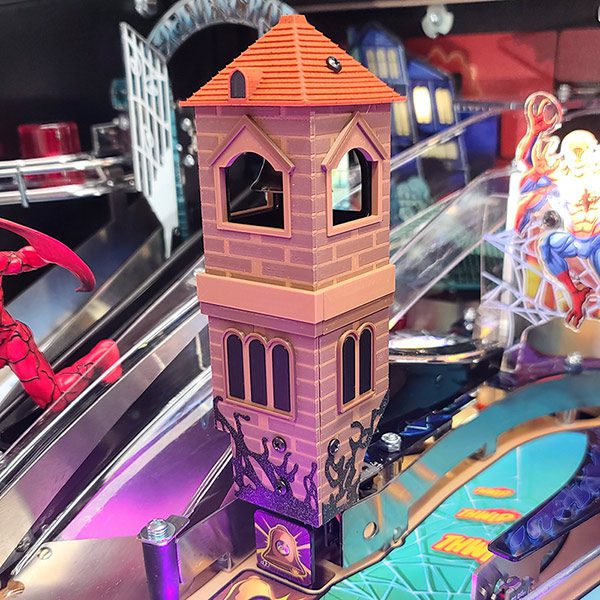
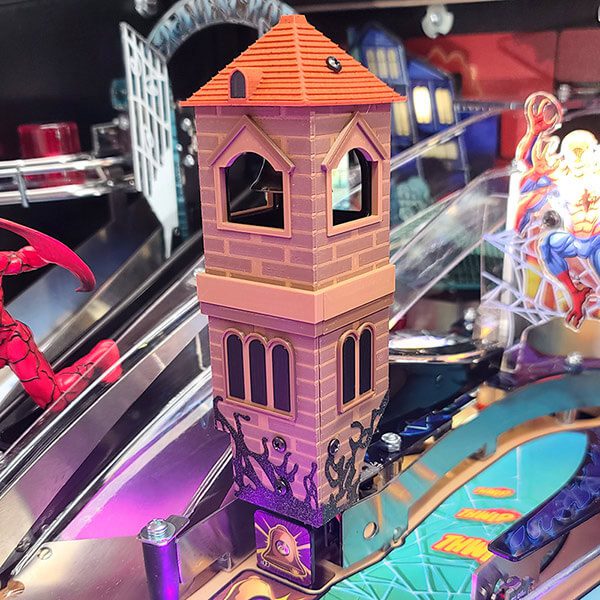
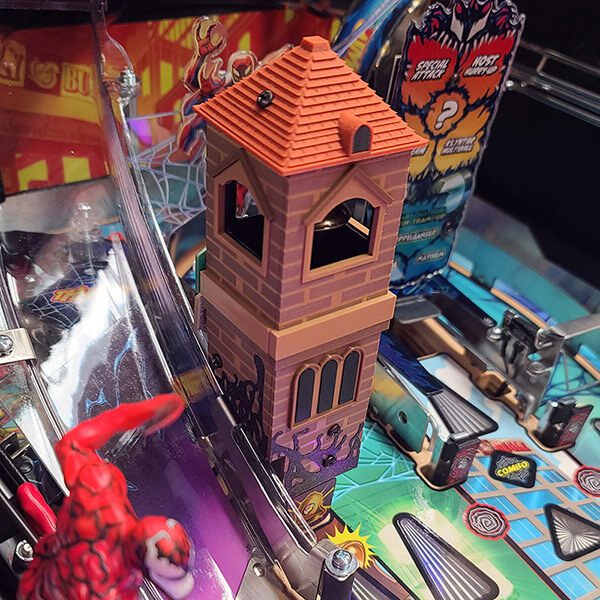
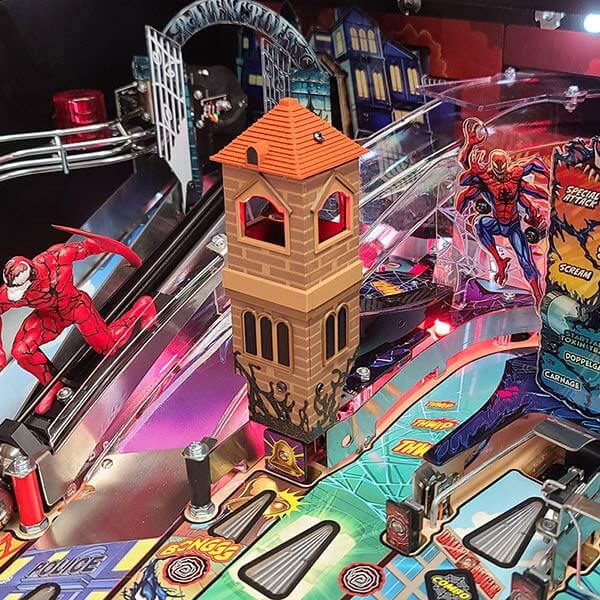
Introducing FlipMods’ Venom bell tower mod! Replace that boring, 1-dimensional bell tower with this custom 3-Dimensional bell tower kit. Includes 4 panels (front, left, right & roof) for the Pro, Premium & LE models. Installation is simple and not permanent, it can be easily removed any time. We also offer an illumination kit which includes all hardware necessary to light up the interior of the belltower red.
Installation Instructions
Installation Instructions
Reviews (1)
You must be logged in to post a review.
1 review for Venom Bell Tower Mod